How to Grow Your Wild Orchids on Trees
In South Florida, you can grow orchids on trees in your yard. Most epiphytic orchids (tree-attached orchids) will prefer tropical hardwoods with rough tree bark or a shady palm tree. Select horizontal limbs that have some shade from the afternoon sun. You can also plant directly on the trunks (on the side of the tree), preferably on the north or east face to avoid the direct afternoon sun.
Below, our orchid biologist Jason Downing shows you how to grow orchids on trees. If you want more information on how to grow orchids in South Florida, read more about the Million Orchid Project at Fairchild Tropical Botanic Garden!
In This Article
How Do You Attach Orchids to Trees?
- Identify where on the tree to attach your orchid
- Clean the roots of soil or sphagnum moss
- Spread the roots on the bark of the tree trunk or branch
- Attach the orchid to the tree bark
- Watering to establish the plant
Why Do Orchids Grow on the Branches of Trees?
Is the Orchid Tree Invasive in Florida?
Growing Orchids Indoors
Shop Orchids in the Fairchild Plant Store
How do you attach orchids to trees?
Know your orchid species, know your tree, and know the best location on the tree trunk to grow orchids!
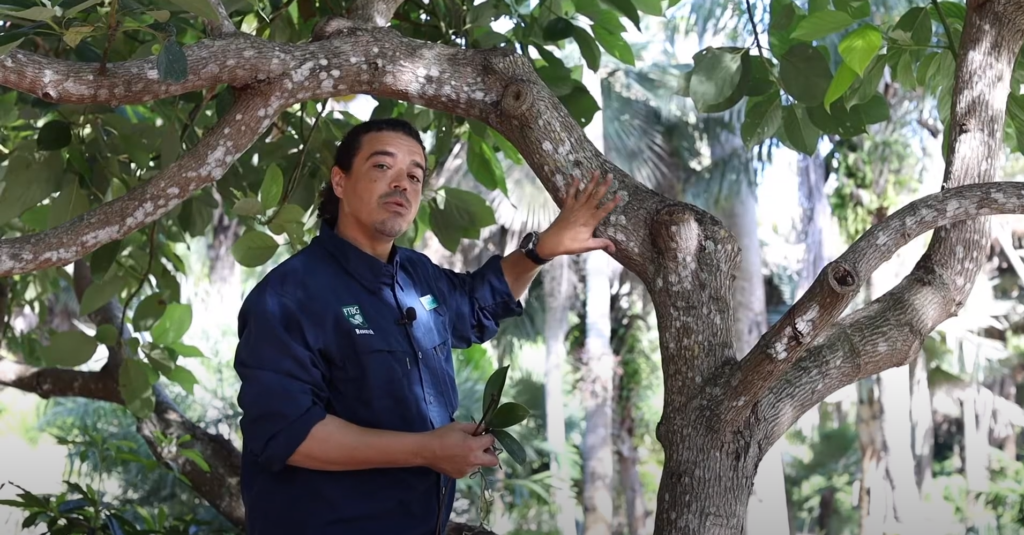
Step 1 – Identify where on the tree to attach your orchid
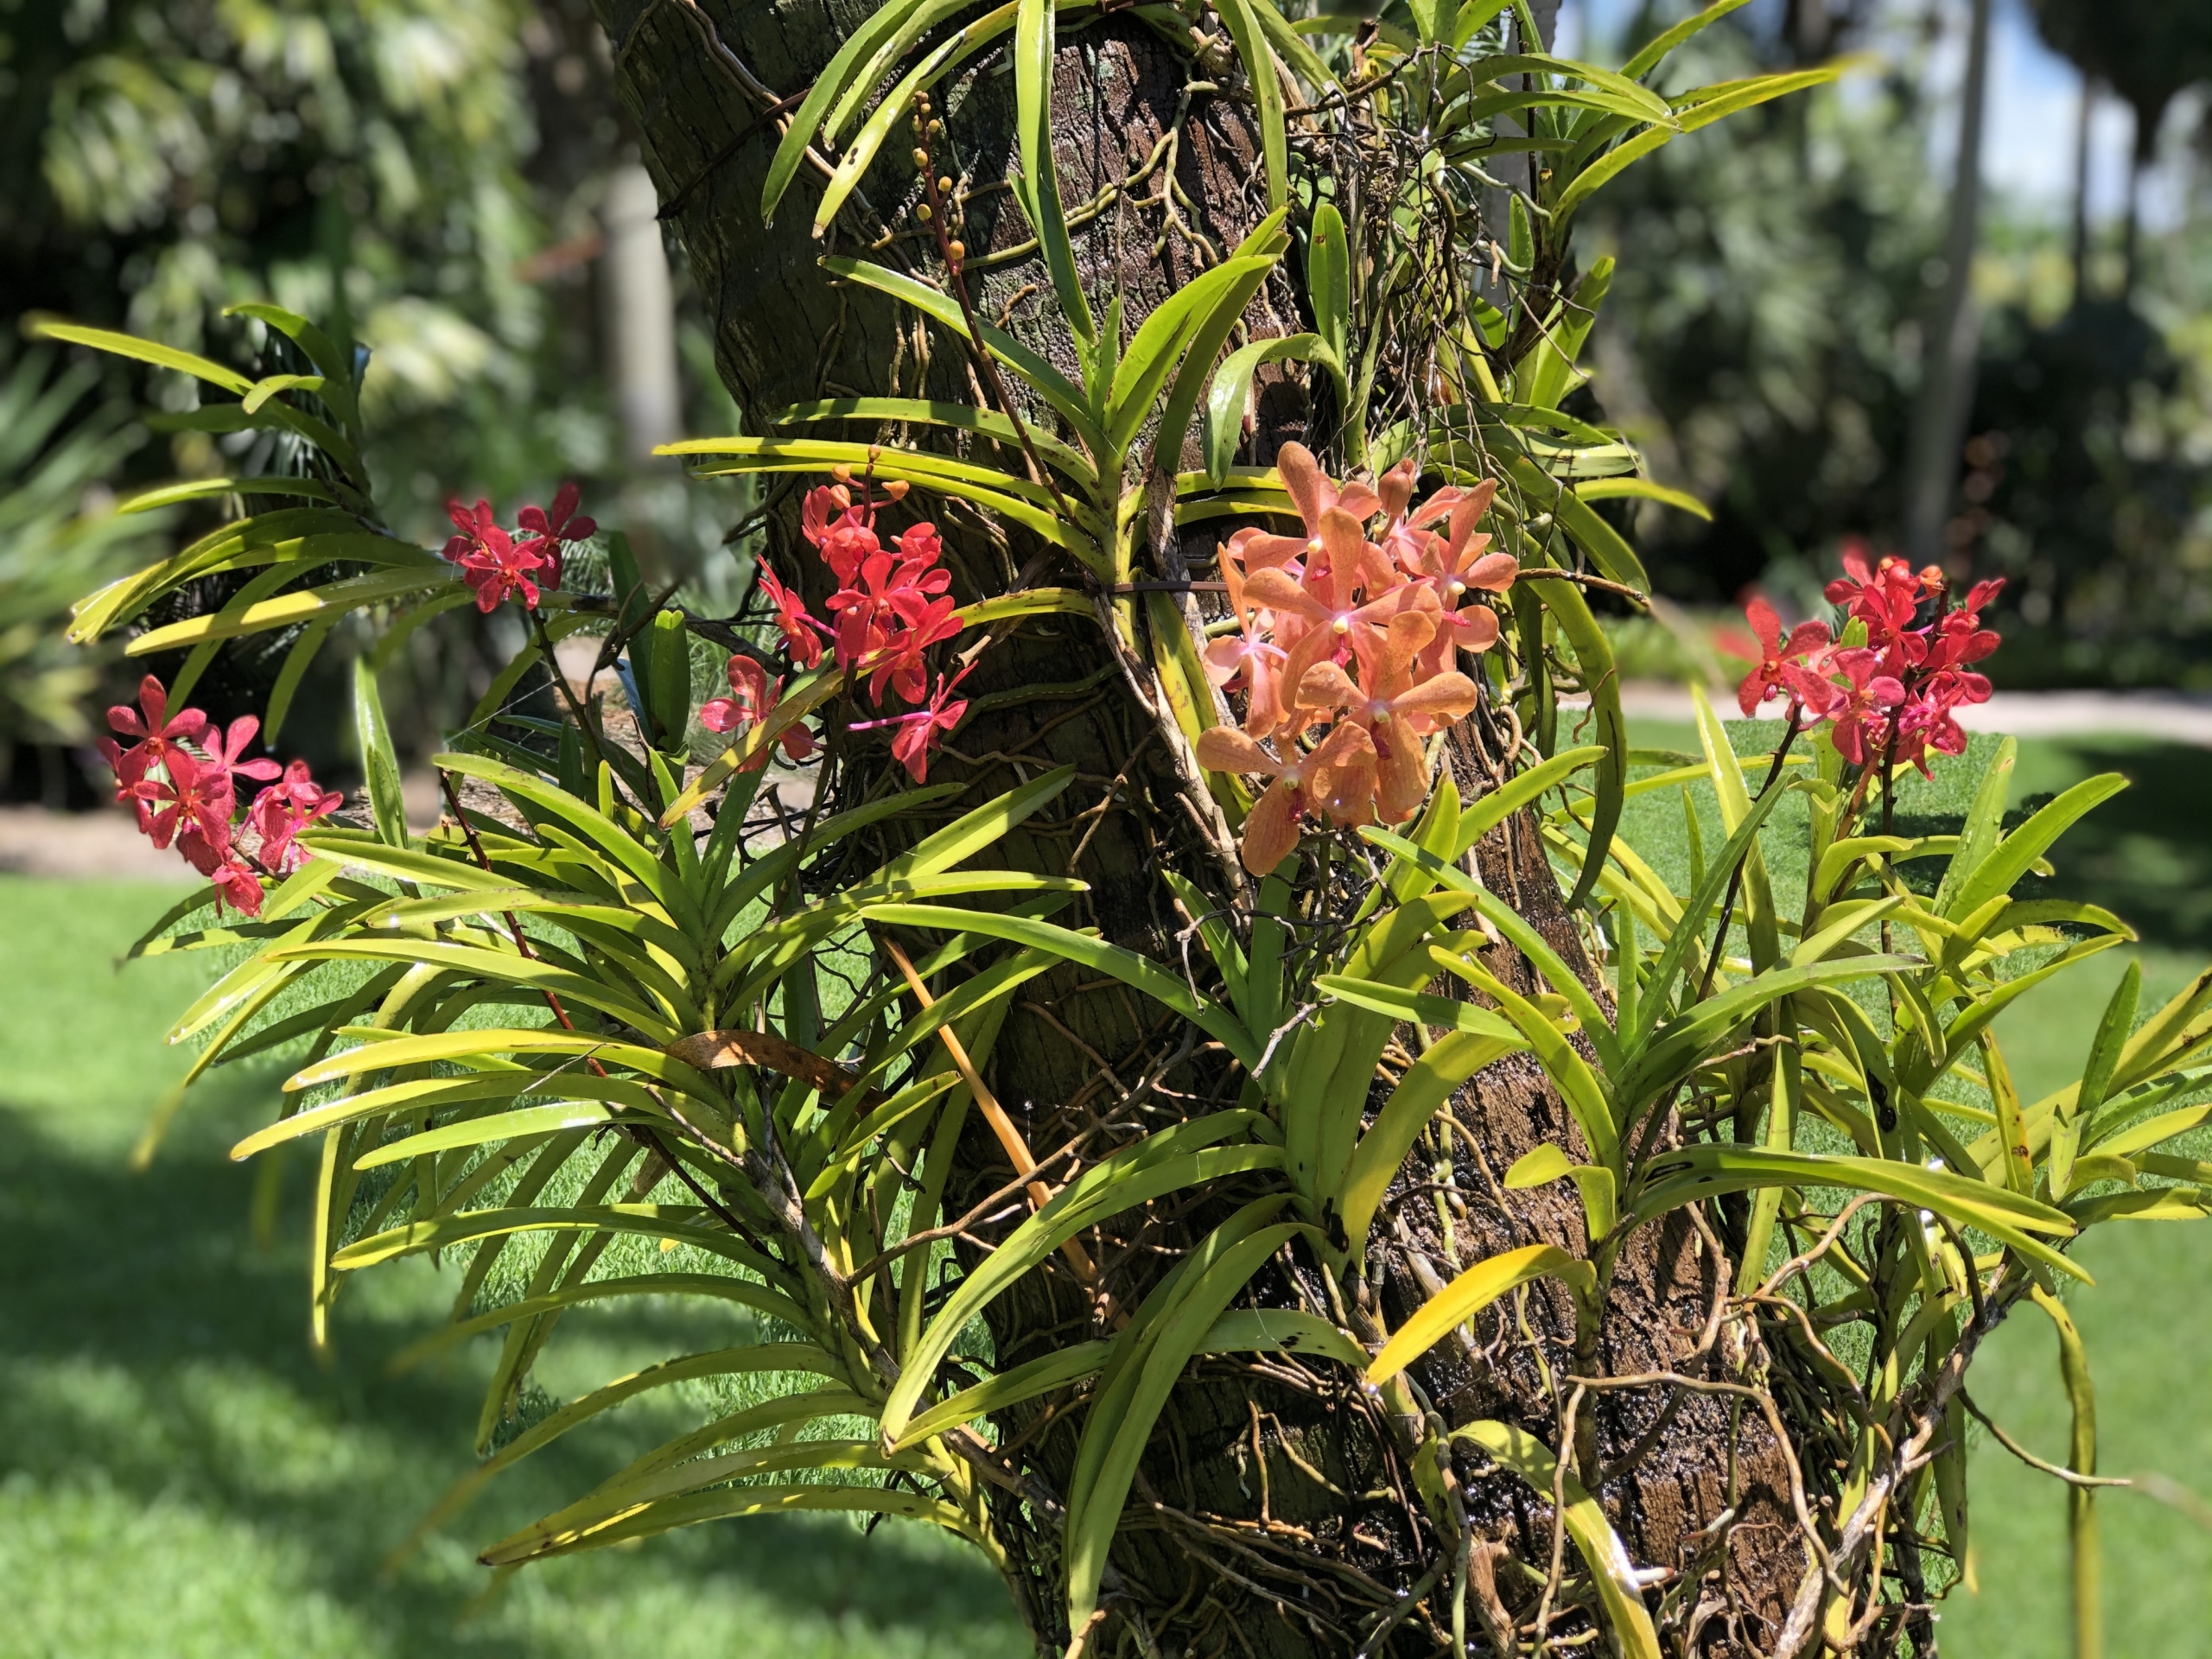
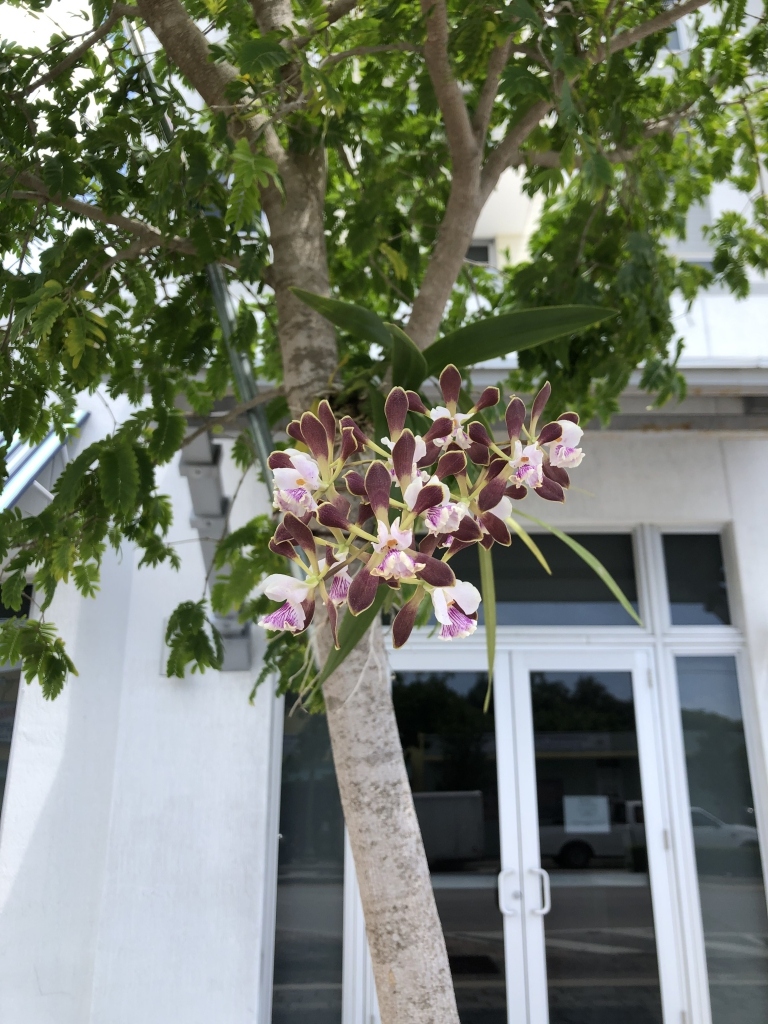
Proper light conditions are essential for mounted orchids. Sun-loving orchid species love the trunk more because it offers more sun. Shade-loving orchids will prefer the horizontal branches and the shade of the canopy. Ideally, opt for hardwood tropicals with rough bark, like mango, avocado, oaks, or really any hardwood with rough-textured tree bark. Palms are a great selection for hot-growing species that want a lot of light.
Shade-loving orchid species – low to medium light levels
Plant these species in the branches near the trunk of the tree, where they will get plenty of canopy cover, or on crotches between branches and the trunk or structures on the bark near the trunk of the tree where they’ll get protection from the sun. Look for the presence of lichen (green, grey, white, and yellow blotches on the trunk) – these tend to indicate moister and shadier conditions, ideal places to grow orchids.
Partial shade or sun-loving orchid species – medium to bright light levels
Select a spot closer to the ends of the branches of the tree, a branch with a horizontal orientation, but still thick enough to give purchase to the roots of the orchid. The spot should give some sun but give some protection via the partial shade of the canopy. Once again, look for the presence of lichen to indicate moist conditions.
If you have a particularly sun-loving species, you can opt for palm trees in direct sunlight or a branch with bright sun.
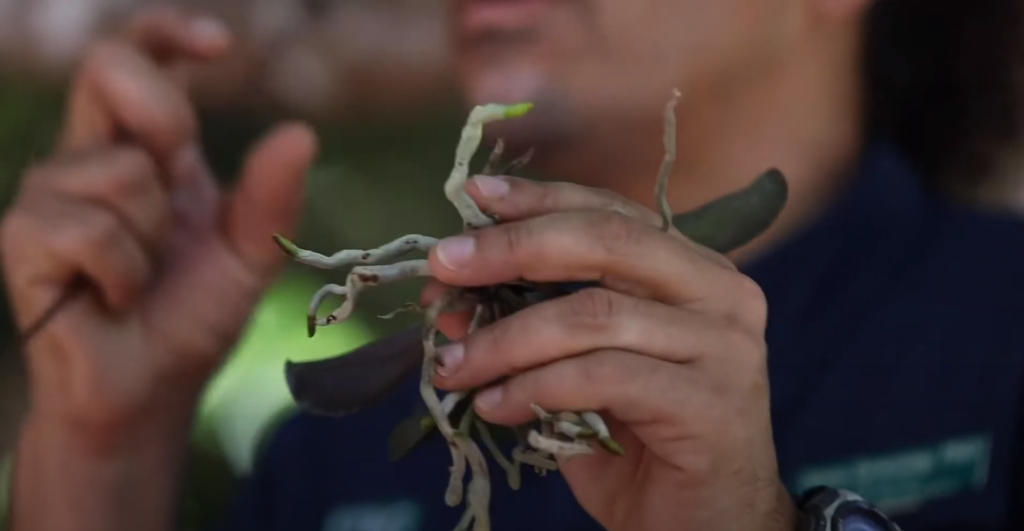
Step 2 – Clean the roots of soil or sphagnum moss
Identify the new roots near the base of the stem. You will want to try to make the roots at the base of the stem – called the “pseudobulb” – press directly against the tree. You don’t want anything impeding that – don’t leave moss on it the pseudobulb, as the new roots will have to grow through it to attach. If you’re starting with an orchid in a pot, get all the potting medium (sphagnum moss/soil) off the roots. Make sure the new roots are completely naked.
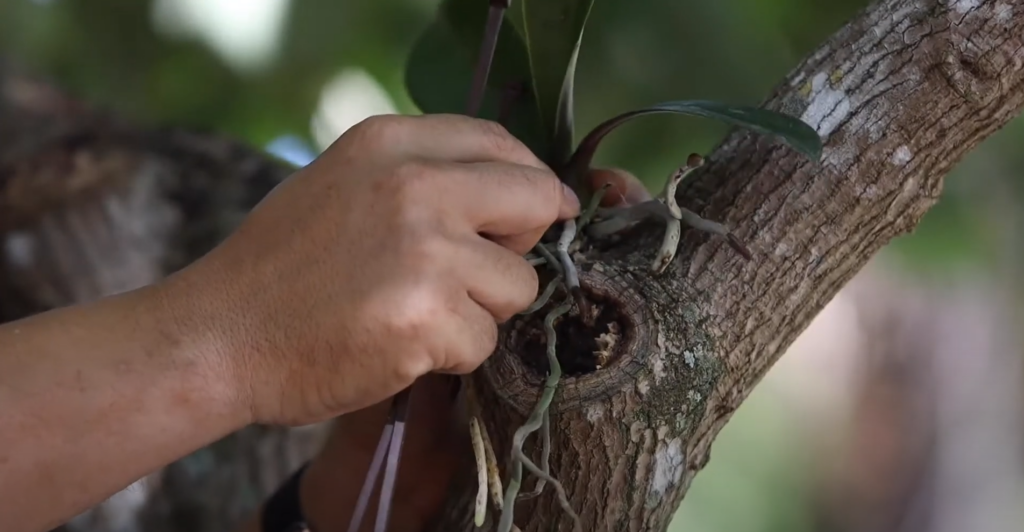
Step 3 – Spread the roots on the bark of the tree trunk or branch
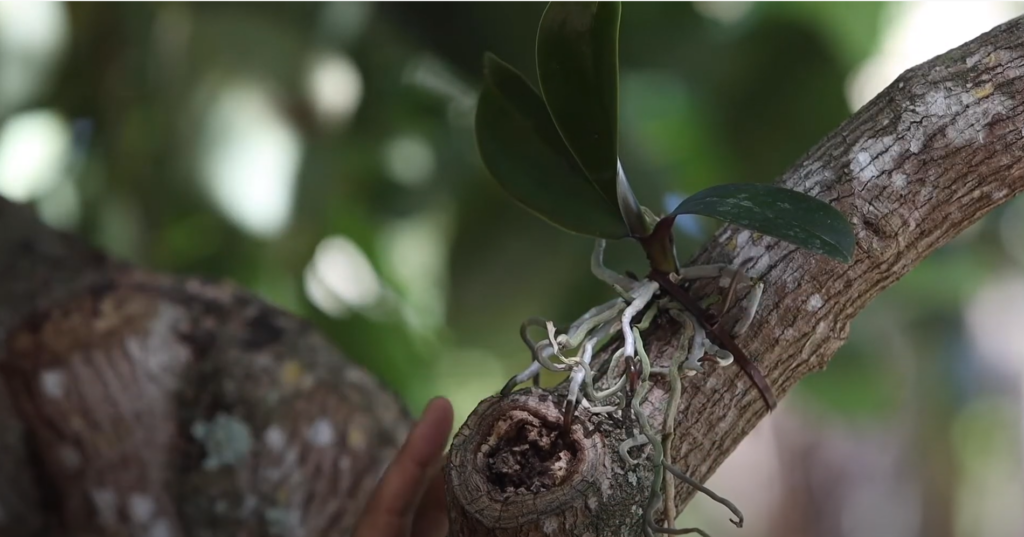
The new roots grow from the pseudobulb and are what will attach to the tree, but the old roots are still functional and you should leave them on. The most important thing is to make sure the orchid roots are bare and that the roots are very tightly secured to the rough bark of the tree trunk or tree branches. Then, get as many of the roots onto the bark as possible, spreading the roots as necessary.
Step 4 – Attach the orchid to the tree bark
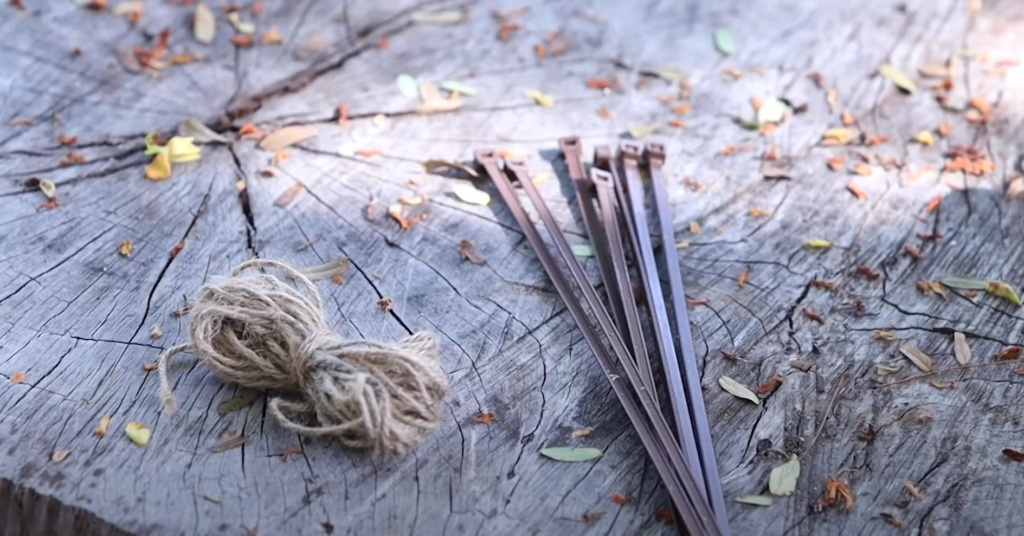
When it comes to attaching orchids, use a strong non-metal material. Use jute, burlap, or another plant-based twine – a material with a high tensile strength that will biodegrade and fall off the tree after the orchid is attached. You can opt for zip ties if the plant is really heavy. Zip your plastic ties on as tight as possible with the pseudobulb off the tree. The zip ties will eventually snap and will not girdle your tree. Avoid using metal wire for orchid attachment, as this can kill your tree as the tree grows.
Anchor the orchid close to the strongest point on the plant – where the stem and the roots meet – all the while ensuring that the new root tips are touching the bark. Orient the plant so the roots face downwards and the leaves face upwards. Avoid pressing the leaves against the bark to improve airflow and reduce rot. Once the orchid is attached to the tree, tap it a few times to make sure it is secure.
Step 5 – Watering to establish the plant
Follow up the initial mounting of your orchid plants to the tree with aggressive watering. When first establishing a plant, water the orchid roots daily for a good two weeks. After 2 weeks, you can slowly wean the orchid off water; by week 3, water every other day. At week 4, water it every 3 days, and after a month, there’s no need to keep watering.
Additionally, you can blanket the roots to cover the top of the roots – a product you can use safely is coconut husk, which will hold a little bit of water for a little longer. If all goes well, you may expect that your newly established orchids bloom in the coming spring and summer months.
Learn more about how to grow orchids on trees in South Florida in our video demonstration:
Why do orchids grow on the branches of trees?
It’s an evolutionary trend that we think is to escape the competition of the understory of the tropics. In a tropical forest, thousands of species are competing for little ground and sunlight. In the understory, there’s an evolutionary arms race of which plants can grow the fastest; plants even kill each other through chemical warfare and blocking out light. Orchids grow in “low rent” real estate to escape such as tree trunks, rocks, and cliffsides. Because they evolved this behavior in tropical climates, these orchid plants also do well in South Florida.
Is the Orchid Tree invasive in Florida?
No, it is not, and it is a great option for attaching an orchid native to South Florida.
Growing Orchids Indoors
If you don’t live in South Florida or another subtropical or tropical climate outside the US, it is likely impossible for you to grow orchids on trees in your yard. When it comes to most orchids cultivated as houseplants, conditions will generally be the same in all houses, except maybe sunlight levels (which could depend on how far north or south you are, the amount of natural light in your room, and how many overcast days per year you have).
In general, opt for cooler climate orchids native to temperate regions, as most tropical orchids don’t like the cold and dry conditions of a house. A great choice for the indoors is the Jewel Orchids (Ludisia discolor).
Indoor orchids are commonly planted on sphagnum moss, fir bark, or peat moss as potting materials. Some may even prefer soil, although soil may often keep the plant too moist in the pot and cause problems. Frequently grown indoor sympodial orchids for beginners include the moth orchid, a Phalaenopsis hybrid, or Cymbidium varieties, which have a few cooler-climate varieties you can get away with growing indoors. Cattleya, a genus of South and Central American orchid, also grows well on fir bark and other potting substrates; Cattleyas can be great choices for an indoor plant, and with its bright pink flowers, a Cattleya is always a crowd-pleaser.
Additionally, orchids growing indoors can mean a variety of different things. Is your indoor growing environment a low-light shade house or a bright greenhouse, or are you just growing in your house? Will the room have good air circulation? These conditions might change the ideal species to choose for growing.